Some exclusions apply. Free shipping on orders over $49 will be automatically applied at checkout for delivery within the continental US only. International shipping rates and shipping to Alaska, Hawaii, and Puerto Rico will be calculated based on order’s size, weight, and final destination. Oversized and drop ship products such as: Refurbished products are not included.
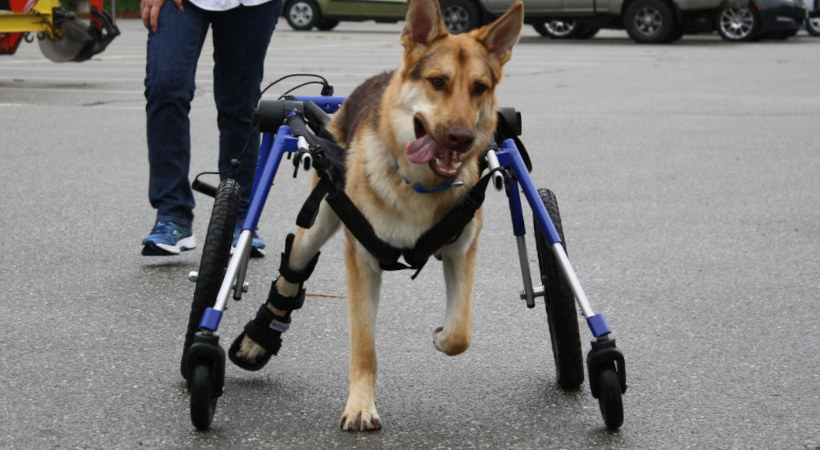
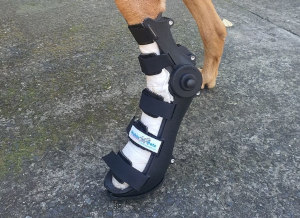
Splints provide protection and support to your dog in their injured area. They’re essentially bandages, but for the dog, and have the additional advantage of preventing movement of the injured part.
For example, if a vet uses a splint to support the fractured bone of an animal, the joints below and above the fracture are immobilized. They are usually applied below the knee, on the back leg, or below the middle of the humerus (a bone connecting the shoulder) to the elbow of the front leg.
If your pet has a splint, here are five tips to help them get through the experience fully healed.
In theory, because of its anti-inflammatory benefits seen in arthritic dogs, you can also use it for your dog to remedy any inflammatory pain. The research on CBD is in its initial stages, but some studies and anecdotal evidence have found that it may help treat anxiety and pain.
2. Ensure the Area Remains Dry
When your furry friend has a splint, you want to avoid baths, puddles, or letting them lick that area. Though the splint may be waterproof, large amounts of water may lead to infection in that area because the wet conditions are a breeding ground for bacteria. So, the splints must be kept dry at all times, and if they get damp, wet, or soiled, don’t redress them yourself. Book a veterinarian appointment as soon as possible and let them do it instead in a clean and sanitized environment. Wet splints, bandages, and slings are hazardous to your pet.
If your furry friend goes outdoors, you can use a temporary waterproofing solution to secure the splint fully. The waterproof covering must only be used for short periods — not more than an hour at a time and removed when your pet comes inside immediately.
If it remains for more than 60 minutes, the moisture build-up inside the covering will result in a damp splint. Generally, your pet should stay indoors or in its kennel as long as it has a splint in place. And if the splint gets wet, don’t let 24 hours pass while it’s still on your pet.
3. Your Vet Is an Integral Part of The Healing Process
You should try and check your pet’s toes and tissue at the bottom of the splint at least once a day. If you discover any swelling, the splint may be too tight, and it needs to be checked by your vet immediately and probably adjusted. If the splint is on the animal’s limb, swelling is likely to appear as the spreading apart of the toes. Use the other healthy leg or foot to compare.
If the splint appears twisted or chewed, smells bad, or has slipped, or is damaged somehow, you need to take your pet to the vet for an immediate recheck.
During this period, your vet is critical to your dog’s wellbeing. Call your vet and update them on your pet’s progress as often as you can, as well as ask any questions you may have. Monitor the skin near the edges of the splint for redness, chafing, or any rash. If any of these issues are present, get your pet to the vet immediately.
4. Ensure the Splint Is Always Clean
Restrict any activity while your dog has a splint unless instructed otherwise by your vet. This way, the splint remains and reduces the number of times it has to be changed due to dirt. If the splint gets dirty, gently clean its exterior using a slightly damp washcloth. Don’t stuff or poke the splint in any way, nor put anything inside, such as your fingers, cotton balls, or a scratching stick.
Sharp objects may cause more harm to the wound, and stuffing it could make it tighter and cut off circulation. Do a sniff test occasionally to figure out if there’s a foul smell coming from the splint. A bad smell is usually the first sign of a brewing infection.
5. Don’t Let Your Pet Destroy the Splint.
Even though you do your part in cleaning and ensuring the splint is dry, your pet may have other plans for you! One awful itch is enough to ruin the splint because all they’ll want to do is scratch. Scratching the splint may do more damage than good, so you want to stop this from happening. You can cover the other feet, especially if your furry friend has a habit of scratching a lot. Put a sock over the other feet and secure them gently but firmly. It’s not fun for them, but it’s for their own good. If that fails, try using a dog cone. This tactic is especially great if they’re prone to biting, licking, and scratching the area. You can place a cone over their head the first few days to get them used to the splint at first.
Conclusion
You need to take extra care of your mutt during this time. Do everything in your power to ensure your dog gets through the splint successfully on its path to recovery.